|
2 |
データベースの作成とyiiのスキャフォールディング準備 |
データベースの作成
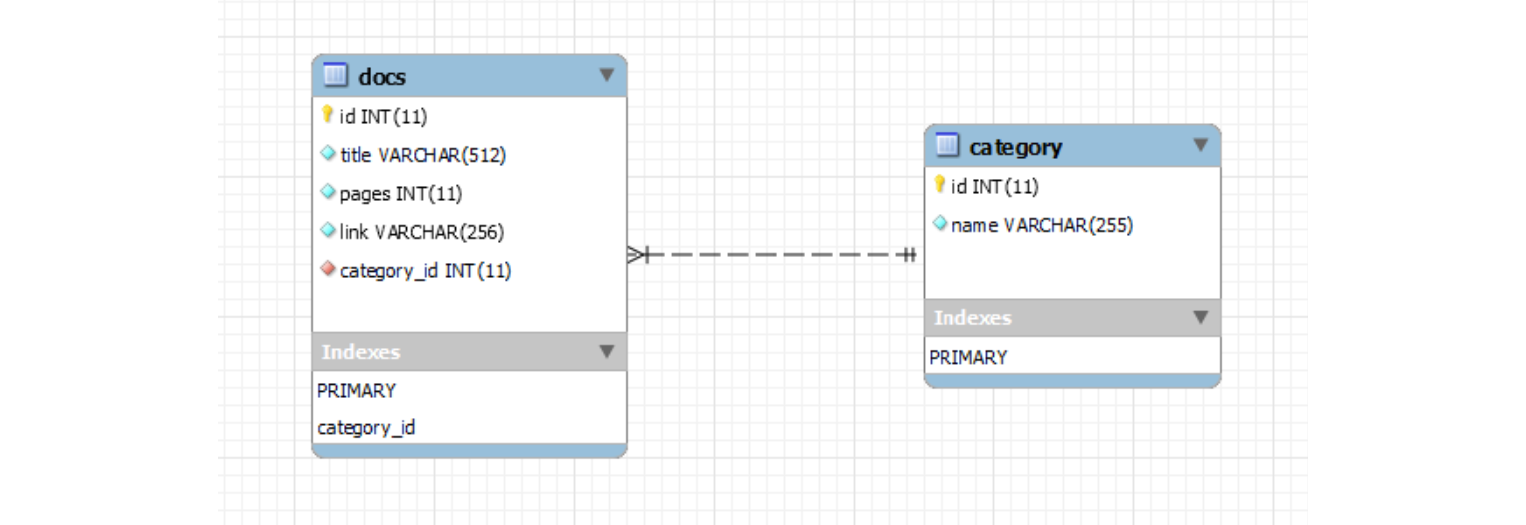
ER図作成ツールであるmysqlworkbenchをダウンロードし、インストールします。次にER図を作成します。これは前稿で設計した仕様を入力します。

yiiによるスキャフォールディングの準備
まずyiiを用いて実行します。yiiのインストールは済んでいるものとします。次のとおりyiicにより、アプリケーションひな形ディレクトリを作成します。太字が入力する部分です。
\$ /var/www/html/yii/framework/yiic webapp doctest
Create a Web application under '/var/www/html/yii/demos/doctest'? (yes|no) [no]:yes
mkdir /var/www/html/yii/demos/doctest
mkdir /var/www/html/yii/demos/doctest/protected
:
mkdir /var/www/html/yii/demos/doctest/images
Your application has been created successfully under /var/www/html/yii/demos/doctest.
models, views, controllersを一時書き込み可能とします。Giiの自動生成による書き込みはウェブブラウザによるため、第3者が書き込めなければなりません。セキュリティ上問題があるため、完了後には書き込み不可にしておきます。
\$ chmod og+w protected/models protected/views protected/controllers
giiの設定をします。コメントを外し、パスワード設定、IPアドレス許可等の変更を行います。
\$ emacs protected/config/main.php
これによりprotected/config/main.phpを以下のように修正します。
         'modules'=>array(

                // uncomment the following to enable the Gii tool

                'gii'=>array(

                        'class'=>'system.gii.GiiModule',

                        'password'=>false,

                        'ipFilters'=>array('127.0.0.1','::1'),

                ),

        ),
mysqlサーバの設定をします。コメントを外し、ユーザ名、mysqlパスワード設定等の変更を行います。
\$ emacs protected/config/database.php
これによりprotected/config/database.phpを以下のように修正します。
  // This is the database connection configuration.

return array(

        // uncomment the following lines to use a MySQL database

        'connectionString' => 'mysql:host=localhost;dbname=test1',

        'emulatePrepare' => true,

        'username' => 'root',

        'password' => 'XXXXXXXX',

        'charset' => 'utf8',

);

Leave a Comment